Thursday, April 15, 2010

Workshop 4 - Storing persistent data

Storing Persistent Data

In a blackberry application, if an objects needs to be saved and then retrieved after the blackberry device is restarted, the object needs to implement the Persistable interface. In this workshop, I will create a blackberry project that saves data and then retrieve data from the application.

Note: Sub-classes of the class implementing Persistable interface do not automatically implement the interface.


Setting up a new project:

In previous workshops, I have shown how to create a Blackberry project using Eclipse. I will create another project "Bookstore" similarly and add a class called "Bookstore.java". The class will extend UiApplication and contain some EditFields, a java.util.Vector variable and a PersistentObject variable. The class will like below.


Menu Items:

I will add menu items to Save and Get item. The Save menu will save the data that is entered and display a success message. The Get menu will retrieve the data from the saved object and populates the EditFields. The codes for the menu items are shown below.


StoreInfo class:


The StoreInfo class implements the Persistable interface. The class declares a Vector variable and some constants. Constants are used to make sure that the data is read from and saved at the same location. The class also contains methods to set and get data from the Vector variable. The code for this class is shown below.


How persistence works:

The code to how persistence works is shown below.


As can be seen, persistence occurs by calling the getPersistentObject(long id) method. This method requires us to pass a unique id that is used to identify the persistent object. The setContents(Object obj) method is used to set the contents that will be saved in the device. The commit() method is called to save the object to the Blackberry device. Data can be retrieved from the device by calling the getContents() method (it returns an Object). In Eclipse, these methods are marked with a padlock. This means that the application has to be signed before it works - however, this will fine within the simulator.

Tuesday, April 13, 2010

Workshop 3 - Localization

Localizing an application really means to make it international. That is, the content of the application can appear in multiple languages. In blackberry, the net.rim.device.api.i18n package is used to enable localization.

For localized application, Blackberry automatically opens the application in the local language. For example, if the default locale settings are set to British English, the application will start up in British English if this Locale is available.

I will create a new Blackberry project as shown in the previous workshops and name it "Local". I have then added a file called Local.java. The class is shown below.


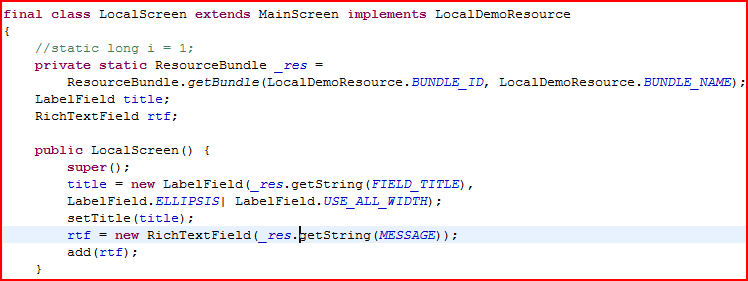
I have then added another class "LocalScreen". This class extends MainScreen and implements LocalDemoResource class. The LocalDemoResource class is relevant for setting up localization.


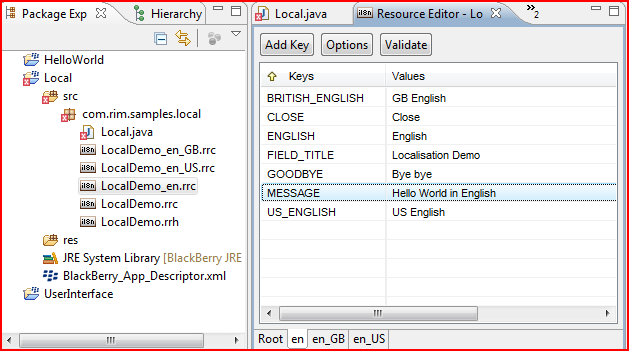
To add a new resource, create a new File of type Other and choose "Blackberry Resource File". The file is named as LocalDemo.rrh. The filename is important as the resource filename (not including extension) + "Resource" becomes the class name that the LocalScreen class implements. Then add keys to the .rrh file. To add contents to the resource files, edit the *.rrc file and add values for the keys to it. Add more .rrc files as needed to add more resources. The screen shots below shows how to add the resource files.


In this workshop, I have added 4 resource files in total and have added keys to resource files. The keys that are added can be called directly from the LocalScreen class.

Then I have added the code for creating the menu similar to the previous workshop, added a OnClose method to close the application and a refresh method to update values on the screen.

Then, running the applciation produced the following screen shots.


References:

Monday, April 12, 2010

Workshop 2 - Creating user interface and adding menu items

Blackberry UI API provides UI components that provide default layout and behaviours which are consistent with the core Blackberry device applications.


Setting Up a New Blackberry Project

In the previous workshop, I created a new project "HelloWorld". In this workshop, I will create a new project and add a new class "UserInterface" that extends UiApplication. The class is looking like below.


Then, another class "UserInterfaceScreen" is added that extends the MainScreen class.
 Variables of various types are declared. The class is looking like below.


Title

The title of the application is setup as shown below.


Managers

The screen is divided into three zones: top, middle and bottom. Horizontal and vertical managers are used to divide the application. The managers aligns up into rows or columns depending in their orientation. This is similar to setting up a components inside a JPanel class in a Java Swing application.

The managers are added in the order they will be displayed on the screen. A vertical manager is built-in on the screen. The code for setting up the managers is below.


Edit and Label Fields

Labels and Edit fields ae added to the middle manager. The code is shown below.


Buttons

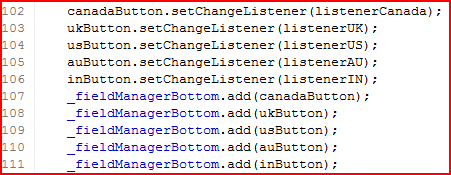
Five buttons have been added with different country names. FieldChangedListener is added to the buttons and the fieldChanged method is implemented.

This event performs action when a button is clicked. The code for creating the button and adding FieldChangeListener is shown below.


The buttons are then added to the FieldManager as shown below.


Menu Items

Two menu items are added to the menu - Close and Change Capital. Close shows a dialog as shown in workshop 1 and exits the application. Change Capital allows the user to edit the capital of the selected country. The method for adding menu items is shown below.


Running the application

When the application is run, the following screens are displayed.


As can be seen from the above screen shots of the simulator, the button for India did not appear and the text on Australia button is concatenated.This is because Blackberry screen does not have enough space to display the button in the same row and does not automatically add a new row.

Therefore, to solve this problem, a new FieldManager will need to be added with the buttons added in it.

References: 
http://na.blackberry.com/developers/resources/A11_User_Interface_V3.pdf

Sunday, April 11, 2010

Workshop 1 - Part 2 - HelloWorld for Blackberry

Creating a HelloWorld Blackberry application

Whenever we start to learn any programming language, we start with a HelloWorld application that prints the text "Hello World!" in the screen, browser or the console. So, in this tutorial, I will start by creating a HelloWorld application for Blackberry.


Creating a Blackberry project in Eclipse

To create a new Blackberry project

Click on File >> New >> Project
Choose Blackberry >> Blackberry Project as shown below


Click on Next and enter Project name as shown below.


Click on Next and the setting will appear like below.


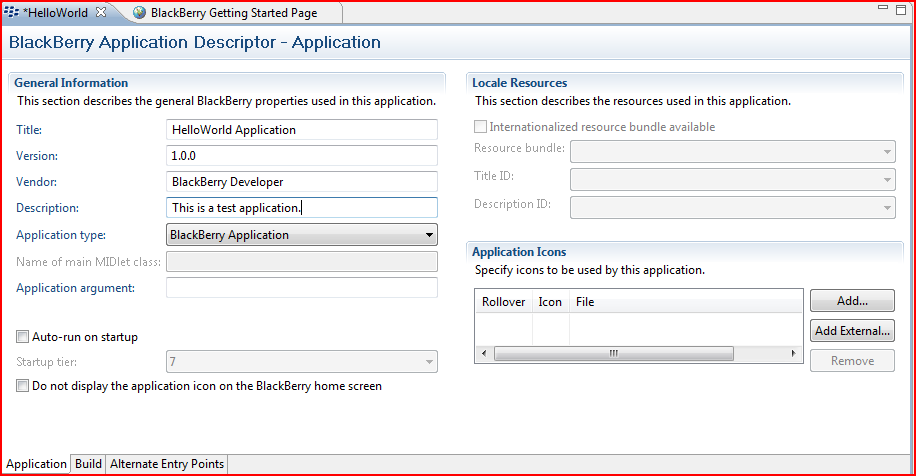
The project is now set up. A screen will appear showing the "Blackberry Application Descriptor". I have added a title and a decription for the application as shown above.


Adding a new class:


To add a new class - Click on New and choose Class. A prompt will appear. Add a Package name and a class name as shown below and click Finish. The class will then be created.


UiApplication


Blackberry applications that have a user interface must extend the UiApplication class. A UI application contains a stack of screen objects. When it adds new screen on to the stack, it drwas them on top of other screens already on the stack. Only the screen on the top of the stack receives input.

To create a UiApplication, the HelloWorld class needs to extend the net.rim.device.api.ui.UiApplication class. The code will like below.


Now, I will add a main method to the class and initiate a new object of type HelloWorld. In the constructor, I will add a new Screen object and display it. The code is shown below.


MainScreen

net.rim.device.api.ui.container.MainScreen class provides a working acrea where data from HelloWorld application can be displayed. I will nowcreate the HelloWorldScreen class shown in the code previously and extend the MainScreen class.

In the constructor, I will add a net.rim.device.api.ui.component.LabelField to set the title of the application and add a net.rim.device.api.ui.component.RichTextField to display the "Hello World!" message. Then, I will add confirmation dialog that displays a message before closing the application. I will need to overwrite onClose() method for this. The code for this class is  below.


Running the application

Running the application is quite simple. Just click on the Debug button and the Blackberry simulator will start. Click on the Applications menu and then Donwloads menu. The HelloWorld application will appear as shown below.


Clicking on HelloWorld application will show the screen as shown below.


Trying to move to any other screen will show the dialog for "closing the application" as shown below.